
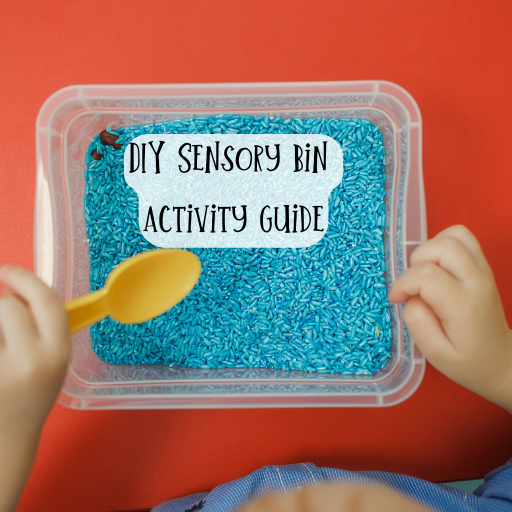
A DIY Sensory Activity Guide for your kiddo with Autism
Creating a DIY sensory bin is an excellent sensory activity for autistic children. It’s an easy and affordable way to give your child the sensory stimulation they need to learn and grow. With a few simple steps, you can create a safe and stimulating sensory bin for your autistic kiddo. In this blog post, we will provide a step-by-step guide on how to build your own DIY sensory activity bin. With this guide, you can create an enjoyable, interactive, and educational sensory bin for your little one in no time!
Understanding the Benefits of Sensory Activities for Autistic Children
Sensory activities can be incredibly beneficial for children on the autism spectrum. These activities help to engage and stimulate the senses, which can promote development and learning in many areas.
For children with autism, sensory activities can be especially important. Many autistic children have sensory processing difficulties, which can impact how they experience and respond to different stimuli. By providing a safe and controlled environment for sensory exploration, sensory bins can help autistic children to regulate their sensory experiences and develop greater awareness and control over their bodies.
Research has shown that sensory activities can help to improve communication and social skills in children with autism. They can also enhance cognitive abilities, such as problem-solving and critical thinking, and improve emotional regulation and overall well-being.
Ultimately, sensory activities provide a fun and engaging way for autistic children to explore the world around them, develop new skills, and build confidence in their abilities. Whether you are a parent, teacher, or caregiver, incorporating sensory activities like sensory bins into your child’s routine can make a big difference in their development and overall happiness.
Choosing the Right Bin and Fillers for Your Sensory Activity
When it comes to creating a sensory bin for your autistic child, the first thing you need to consider is the right bin and fillers. Sensory bins can be made using a wide range of containers, including plastic containers, storage tubs, and even cardboard boxes. You’ll want to select a container that is large enough to accommodate your child’s needs and is easy to store.
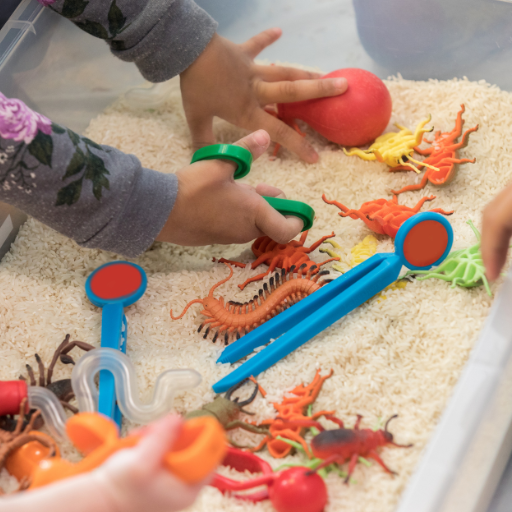
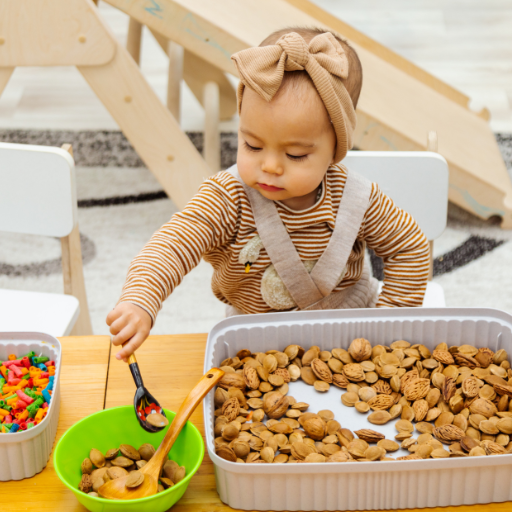
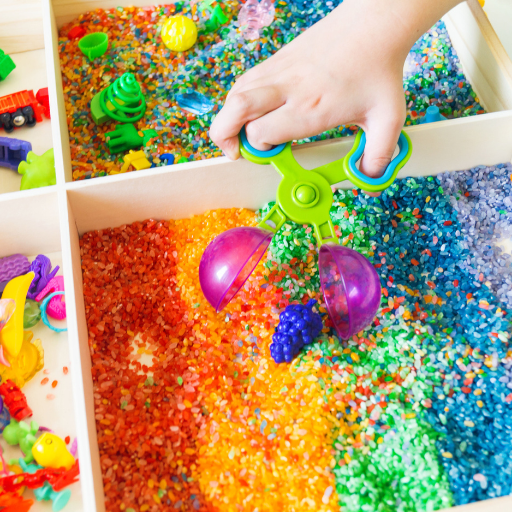
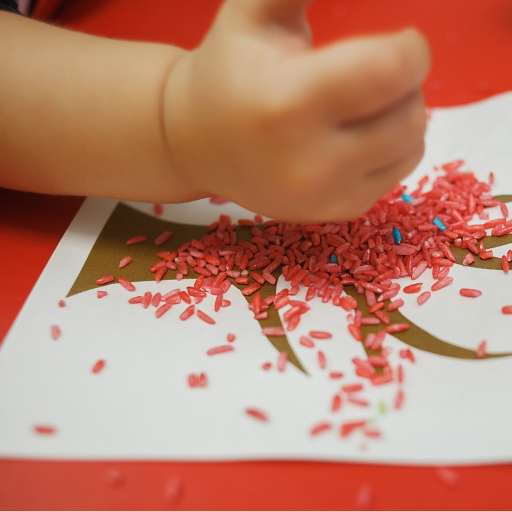
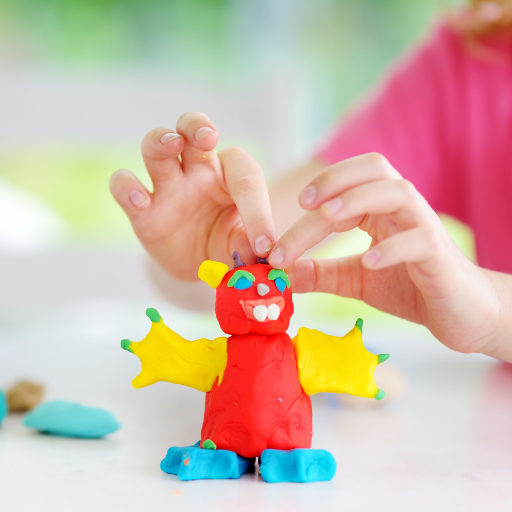
When choosing fillers for your sensory bin, you’ll want to think about what textures and materials your autistic child will enjoy. Some popular fillers include rice, beans, sand, pom-poms, and water beads. You can also add in other items like toy animals, figurines, or other small objects that your child will enjoy exploring with their senses.
It’s important to keep in mind that some autistic children may have specific sensory needs, so it’s important to choose fillers that will be safe and enjoyable for your child. If your child has a tendency to put things in their mouth, be sure to avoid small or hard objects that could be a choking hazard.
In addition to considering your child’s specific sensory needs, you’ll also want to think about how you can make the sensory bin more engaging and interactive. Consider adding in different colors or textures, as well as items that will encourage your child to use their hands and fingers to explore and play.
Choosing the right bin and fillers is an important step in creating a sensory activity that will be both fun and beneficial for your autistic child. By taking the time to consider your child’s specific needs and preferences, you can create a sensory bin that will provide hours of engaging and enjoyable playtime.
STEP 1: How to set up your Sensory Bin
Now that you have gathered all your materials, it’s time to start setting up your sensory bin. Here are some easy steps to follow:
1. Find a quiet, comfortable space for your child to play with the sensory bin. Choose a location that is free from distractions and noise.
2. Start by filling your bin with the base material. Spread it out evenly so that your child has ample space to play and explore.
3. Add your selected sensory materials to the bin, ensuring that they are well-distributed throughout. You can use as many or as few as you like, depending on the interests of your child.
4. Mix all the materials together well. If you are using water, you may want to add some food coloring to create a colorful sensory experience.
5. Encourage your child to explore the sensory bin using their hands, fingers, and even their feet. Allow them to take the lead in exploring and manipulating the materials.
6. Consider adding some tools or toys to the sensory bin, such as spoons, funnels, and scoops. These items can add another dimension to the play and help to promote fine motor skills.
7. Be sure to supervise your child while they play with the sensory bin, especially if they are young or have a tendency to put things in their mouth.
The goal is to create a safe, engaging, and fun sensory experience for your child. So take your time to set up the bin and watch as your child enjoys all the different textures and materials!

Step 2: Compile a list of Sensory Bin Play Ideas and Activities for Your Kiddo
Now that you have set up your sensory bin, it’s time to let your child explore and have fun. Here are some play ideas and activities to engage your autistic child with their new sensory bin:
1. Color Sorting: You can use colorful buttons, beads, or blocks in the bin and ask your child to sort them according to colors. This will help develop their visual discrimination skills and hand-eye coordination.
2. Hide and Seek: Hide small toys or objects in the bin and encourage your child to find them. This will improve their attention to detail and memory skills.
3. Letter and Number Hunt: Add foam letters and numbers in the bin and ask your child to find specific letters or numbers. This activity will help them recognize and identify letters and numbers.
4. Scooping and Pouring: Provide small cups, spoons, and scoops in the bin and let your child practice scooping and pouring the filler material. This will develop their fine motor skills and hand strength.
5. Sensory Scavenger Hunt: Add a variety of sensory materials like rice, beans, and cotton balls in the bin and encourage your child to search for different textures and objects. This activity will stimulate their tactile senses and promote exploration.
Remember to keep the playtime short and supervised, especially in the beginning, to avoid any potential hazards. You can also modify these activities based on your child’s interests and preferences.
Overall, a DIY sensory bin is an excellent way to engage your autistic child in sensory play and improve their cognitive, physical, and emotional development. Have fun exploring and discovering with your little one!
Step 3: Gathering Supplies
Now that you have an idea of what you need for your DIY sensory bin, it’s time to start gathering supplies. You may be wondering where you can find all the items you need. Don’t worry; there are several places where you can find affordable supplies for your sensory bin.
Here are some places you can try:
1. Dollar stores: You can find a variety of sensory bin fillers at dollar stores such as rice, beans, pasta, and small toys.
2. Online retailers: Try stores like Amazon, Target, and Walmart to get items like bin fillers and supplies.
3. Thrift stores: Thrift stores are great for finding affordable items that you can repurpose for your sensory bin.
4. Craft stores: You can find various types of fillers, like sand, at craft stores like Michaels and JoAnn.
5. Discount stores: Stores like Marshalls and Ross carry sensory items such as playdough and kinetic sand.
Remember to keep your child’s sensory preferences in mind when selecting supplies. Don’t be afraid to get creative and use household items you already have. With a little creativity and some effort, you can easily create a sensory bin that your child will love.
Step 4: Incorporate your sensory bin into activities
Sensory bins are incredibly versatile and can be used in a variety of settings and situations. Here are some ideas for when to use a sensory bin for your autistic child:
1. As a Calming Activity: Sensory bins can be a great way to calm your child down when they are feeling overwhelmed or overstimulated. The soothing sensory input can help to regulate their nervous system and provide a sense of comfort.
2. As a Learning Activity: Sensory bins can be a fun way to teach your child new skills or concepts. You can use them to practice counting, sorting, matching, or identifying different textures or colors.
3. As a Sensory Break: If your child is feeling restless or antsy, a sensory bin can be a great way to take a break and refocus their attention. By engaging their senses in a fun and stimulating activity, they can reset and be better prepared for the next task.
4. As a Social Activity: Sensory bins can also be a great way to engage with others, whether it’s siblings, friends, or caregivers. By playing together in a sensory bin, your child can practice sharing, taking turns, and communicating their needs and desires.
Ultimately, there is no “right” or “wrong” time to use a sensory bin. With these 4 steps, you can start your sensory bin today! It’s a fun, calming activity that you can enjoy with your child. It can be a great tool to have in your arsenal for whenever your child needs a little extra sensory input, stimulation, or calm. Have fun with your new sensory bin! Your kiddo will love it!
Other autism parent resources to check out

Autism Parenting Magazine gives you access to: Resources, tips, sensory solutions and so much more. Read more…
![]() Check out positive affirmations for neurodivergent kiddos! These short videos will motivate and empower your kiddo. Read more…
Check out positive affirmations for neurodivergent kiddos! These short videos will motivate and empower your kiddo. Read more…
2 Responses
[…] Sensory products are items designed to provide comfort and promote relaxation for children with autism and ADHD. These products are carefully crafted to address sensory issues, which can range from overstimulation to under-stimulation of the senses. Children with autism and ADHD can benefit greatly from sensory products, as they provide an outlet for them to explore, express themselves, and feel comfortable in their surroundings. […]
[…] crucial for individuals with ASD and APD. Speech and language therapy, occupational therapy, and sensory integration therapy are among the interventions that can help improve communication, sensory processing, and […]